
WordPressのドメインを取得したら、次はいよいよレンタルサーバーを契約してWordPressブログをサーバーに運用しよう。ドメインの取得方法は「お名前.comで独自ドメインを取得する方法」を参照頂きたい。
それではいよいよWordPressをインストールだ。
ドメイン契約で独自ドメインをGetしたら、次はいよいよレンタルサーバーの契約だ。これが済めばWordPressブログHPをすぐ作れる。あと少しがんばろう。
1−1.Xサーバーにアクセス
「エックスサーバー」のサイトにアクセスしよう。
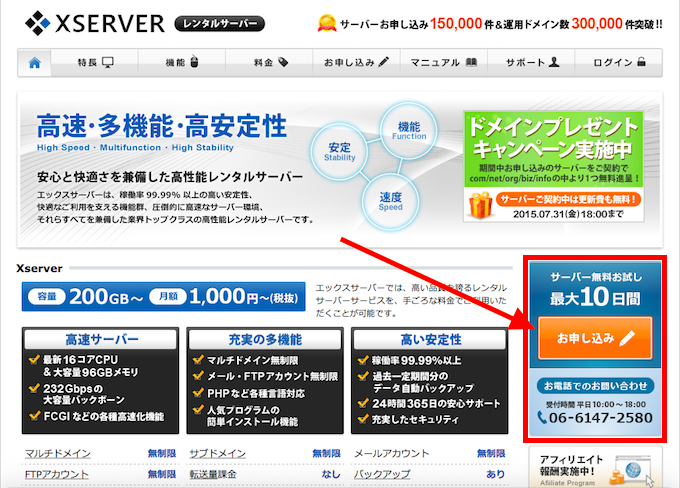
1−2.サーバー無料お試しにアクセス
「サーバー無料お試し最大10日間」の「お申込みボタン」を押そう。
1−3.初めてのご利用・新規お申込みの方を押す
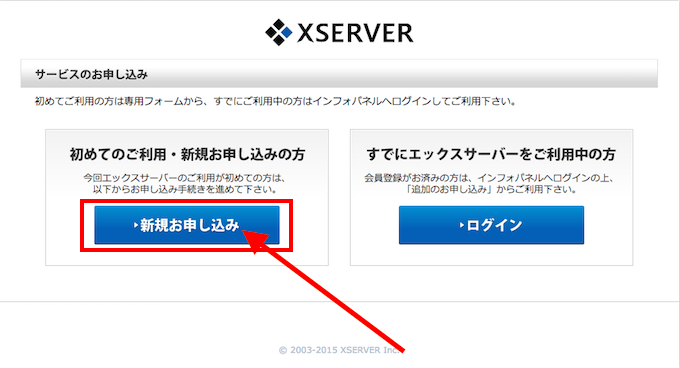
順番にボタンを押していこう。
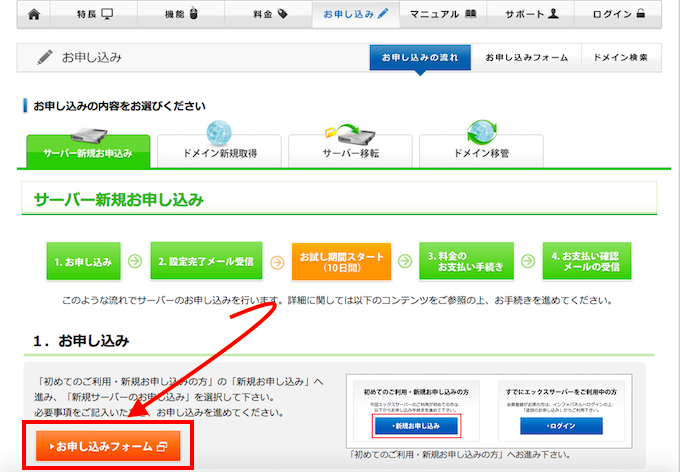
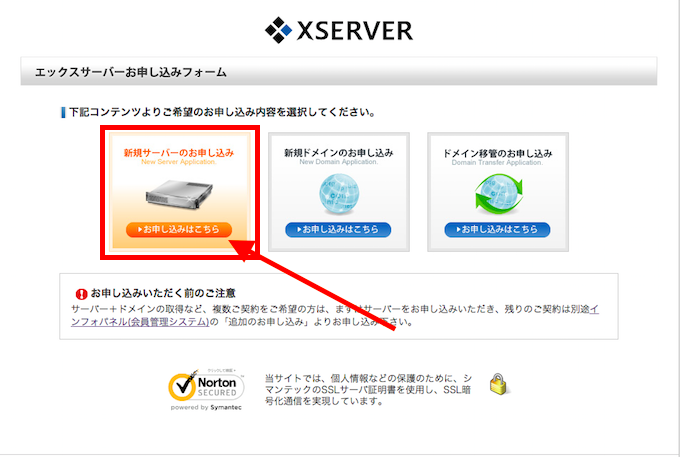
1−4.新規サーバーのお申込みをクリック
1−5.サーバーIDを決める
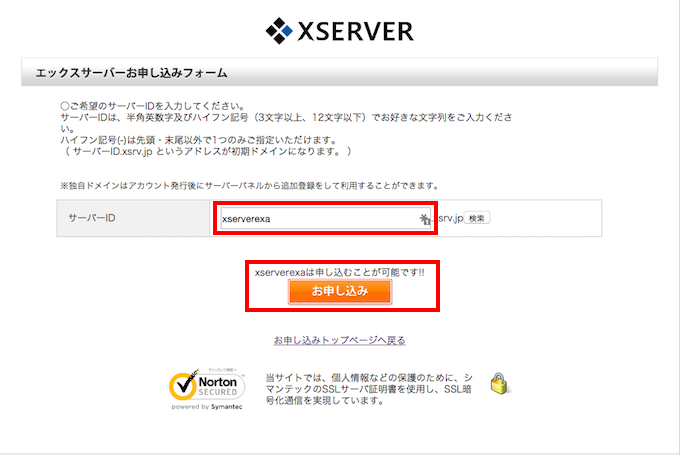
ここではわかりやすいサーバーIDを決めよう。ここでは私も試しに「xserverexa」で登録してみた。
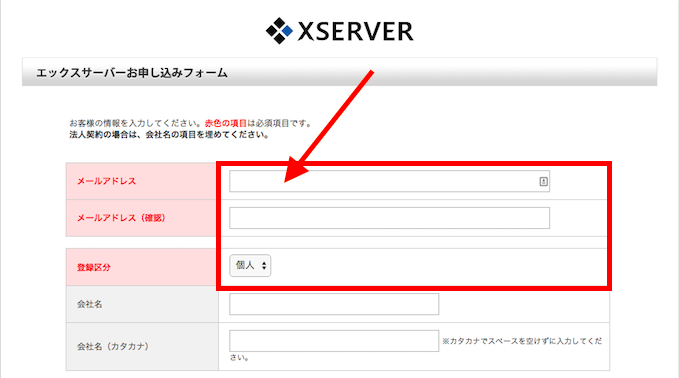
1−6.メールアドレス等個人情報の入力
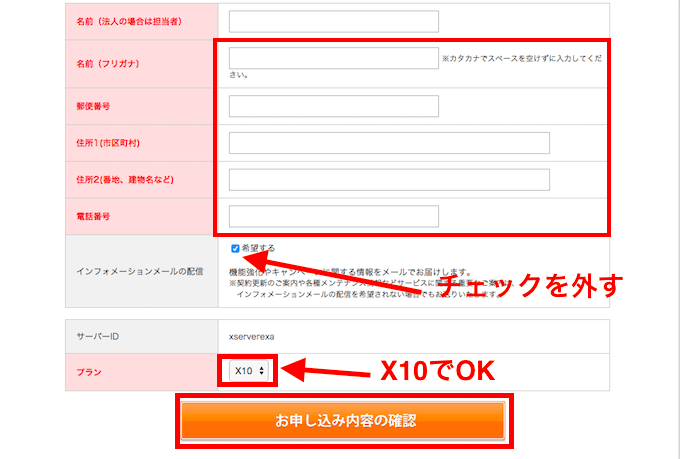
プランはX10で十分だ。月50万〜100万PVのブログでも安定して機能する。
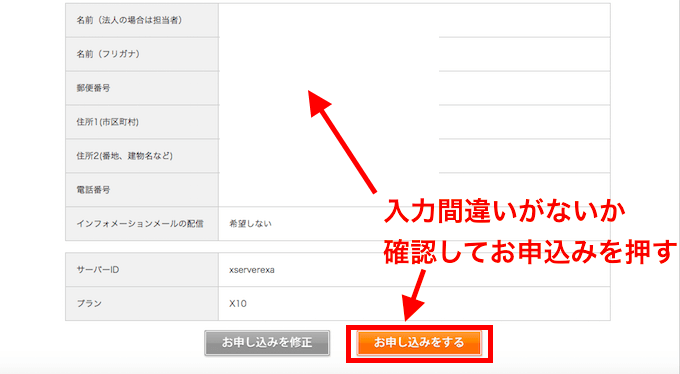
1−7.お申込み完了!
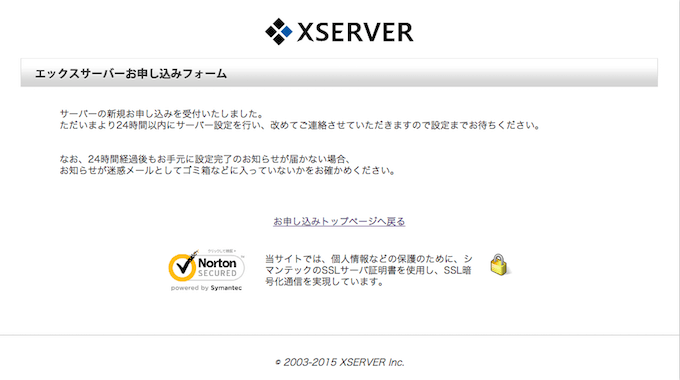
するとすぐにエックスサーバーからメールが届く。登録したメールアドレスのメールボックスをチェックしよう。
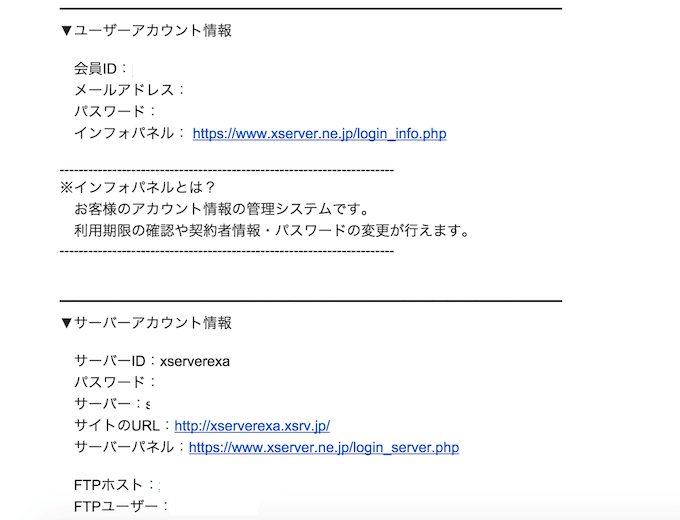
1−8.インフォパネルにログイン
インフォパネルにログインすると次のような画面になる。
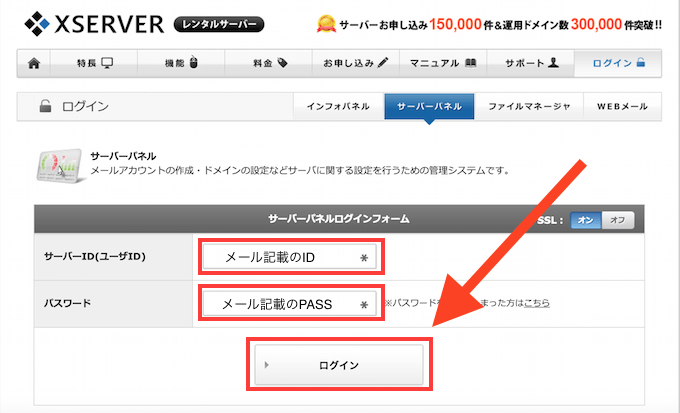
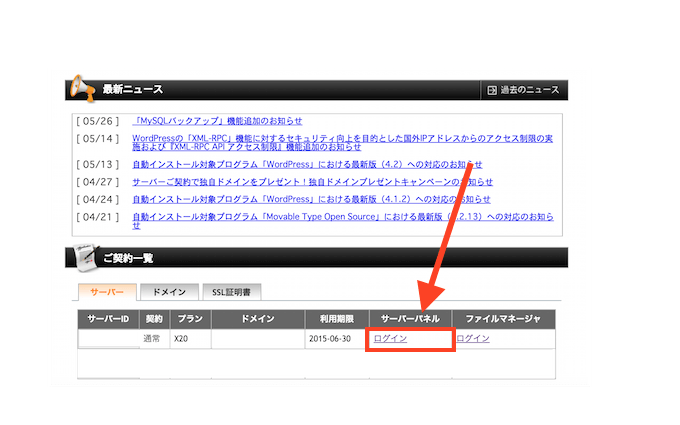
1−9.サーバーパネルにログインする
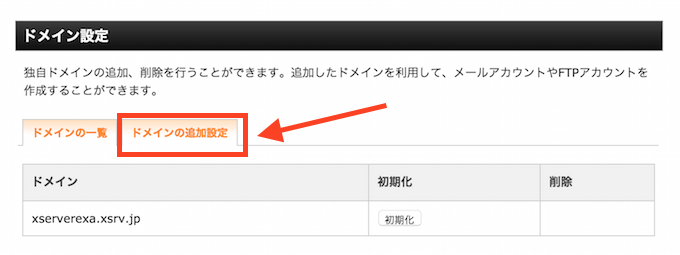
2−1.ドメイン設定する
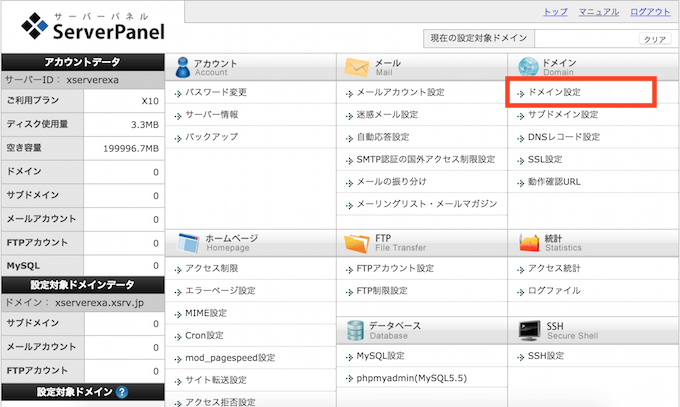
サーバーパネル右上の「ドメイン設定」を押そう。
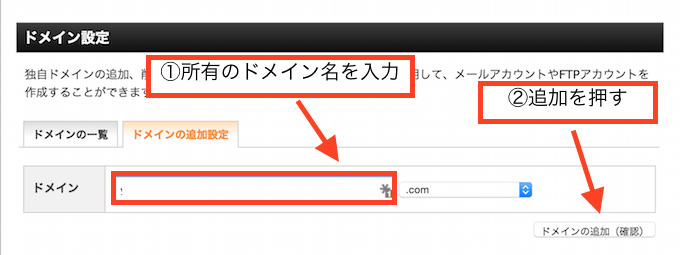
ここでは取得したドメイン名を入力しよう。
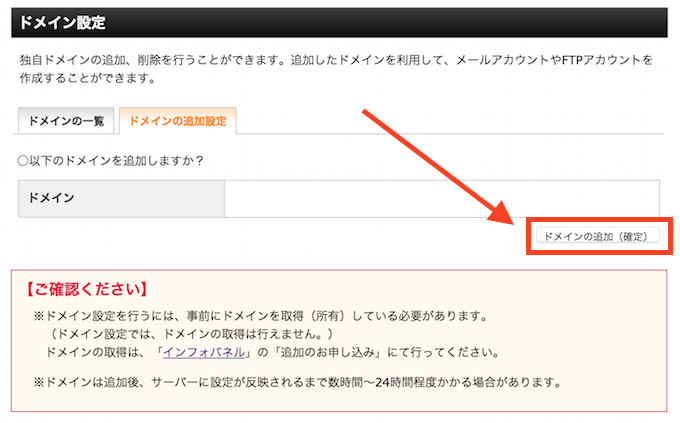

これで、あなたが取得したドメインとサーバーの紐付けは完了だ。複数のドメインを取得している人は、左下の設定対象ドメインで設定を変更しよう。
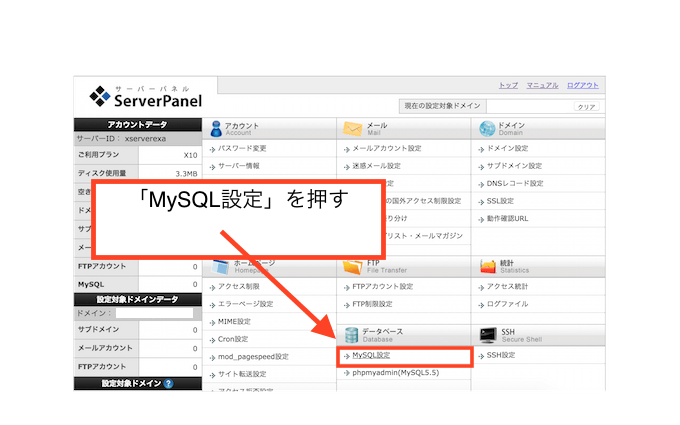
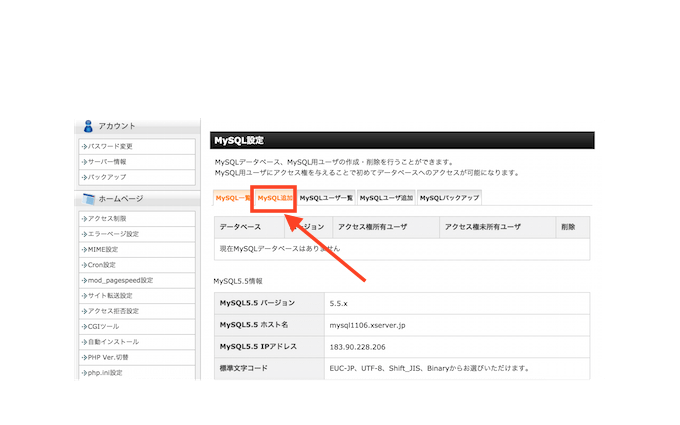
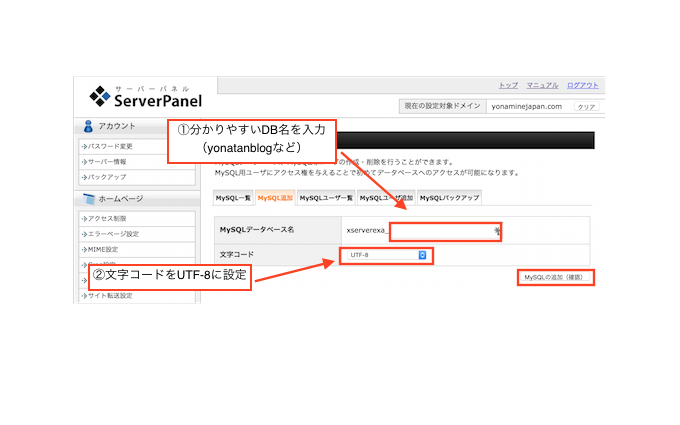
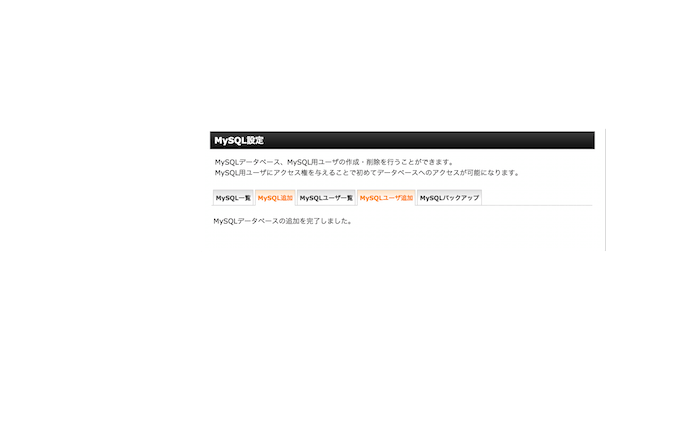
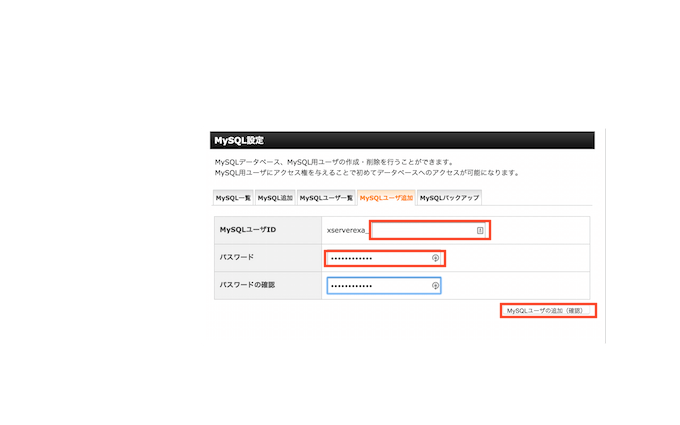
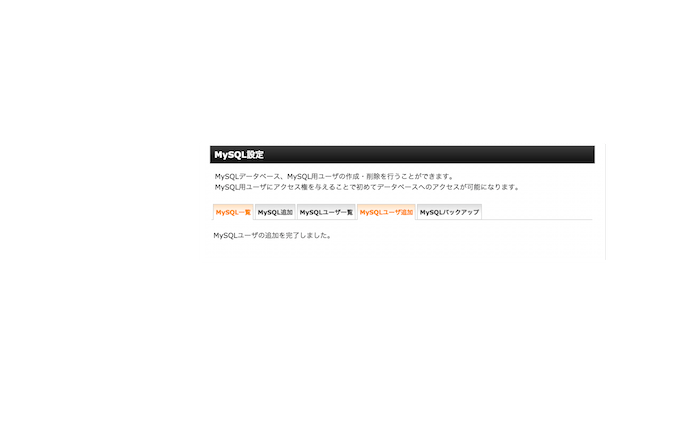
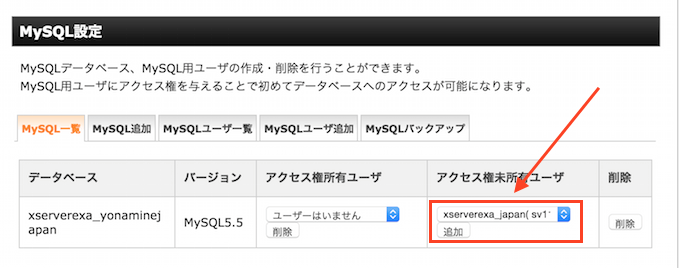
2−2.MySQLでブログ用のデータベースを作成する(任意)
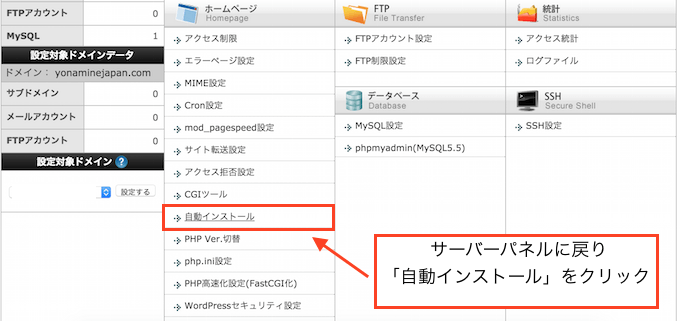
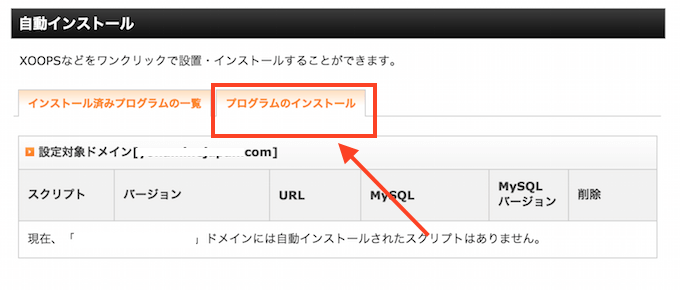
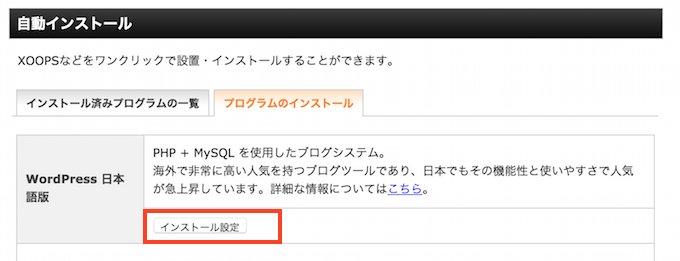
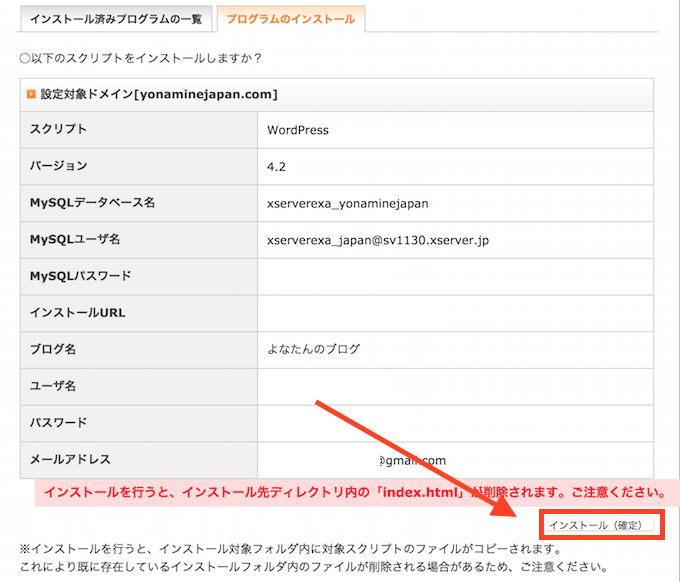
3−1.WordPressを自動インストール

インストールURL:基本的には空欄でOK。ブログを複数作り
たいなら、ここにURLを入力すれば、1つのドメインの下(サブディレクトリ)に何個もブログを作成することが出来る。LPを作りたい時もこういうサブディレクトリに入れるとよい。
-
ブログ名:後で変更できるのでテキトーでOK。
-
ユーザー名:覚えやすいものでOK
-
パスワード:予測されにくいものを入力しよう。
-
メールアドレス:管理用のアドレスを入力しよう
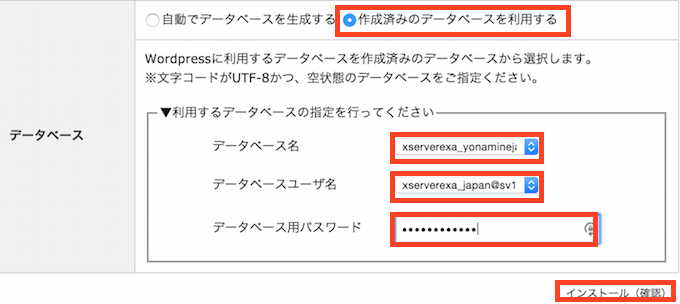
- データベース名:先ほど作成したデータベースを選択
- データベースユーザー名:作成・設定したユーザー名を選択
- データベース用パスワード:ユーザーのパスワードを入力
※こちらは「自動でデータベースを作成する」でも良いが、その場合データベース名が「wp1,wp2」という風になる。複数ブログを作る場合、データベース名は分かりやすい名前にしておくと便利な事がある。
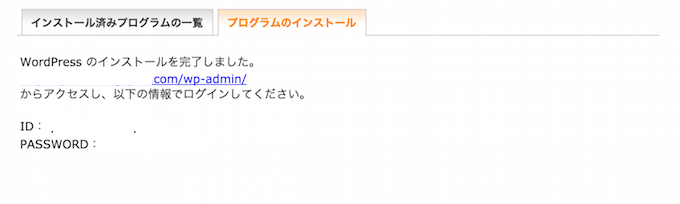
※ドメインを取得したてだったり、サーバー契約をして間もない場合、インストールをしてもブログが表示されないことがある。その際は数時間〜数日くらい時間を置いてから再度アクセスしよう。
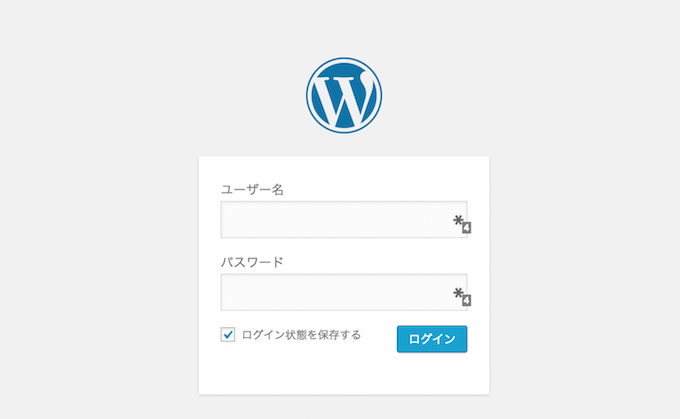
3−2.ダッシュボード(管理画面)にログインする
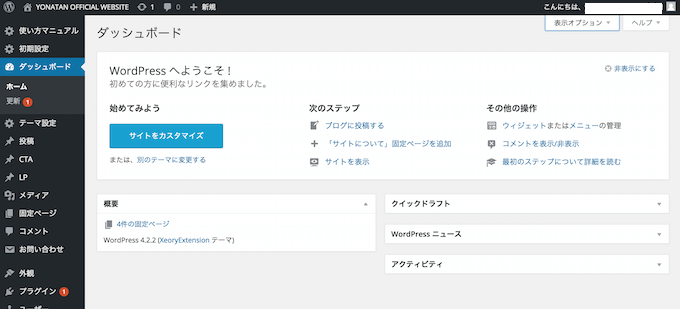
これで無事WordPressを運用できるようになるはずだ。
WordPressがインストールできたら次にやること