今回はWordPressで一つのドメインを使って無料で複数のブログを作る方法を紹介していきます。
すでにXserverでWordPressブログを一つ以上作成している方向けの記事となります。
1.Xserverにログインする
Xserverにログインしましょう。

2.サーバーパネルにログイン
サブに作りたいブログのドメインを選んで、サーバーパネルのログインボタンをクリックします。

3.自動インストールをクリック

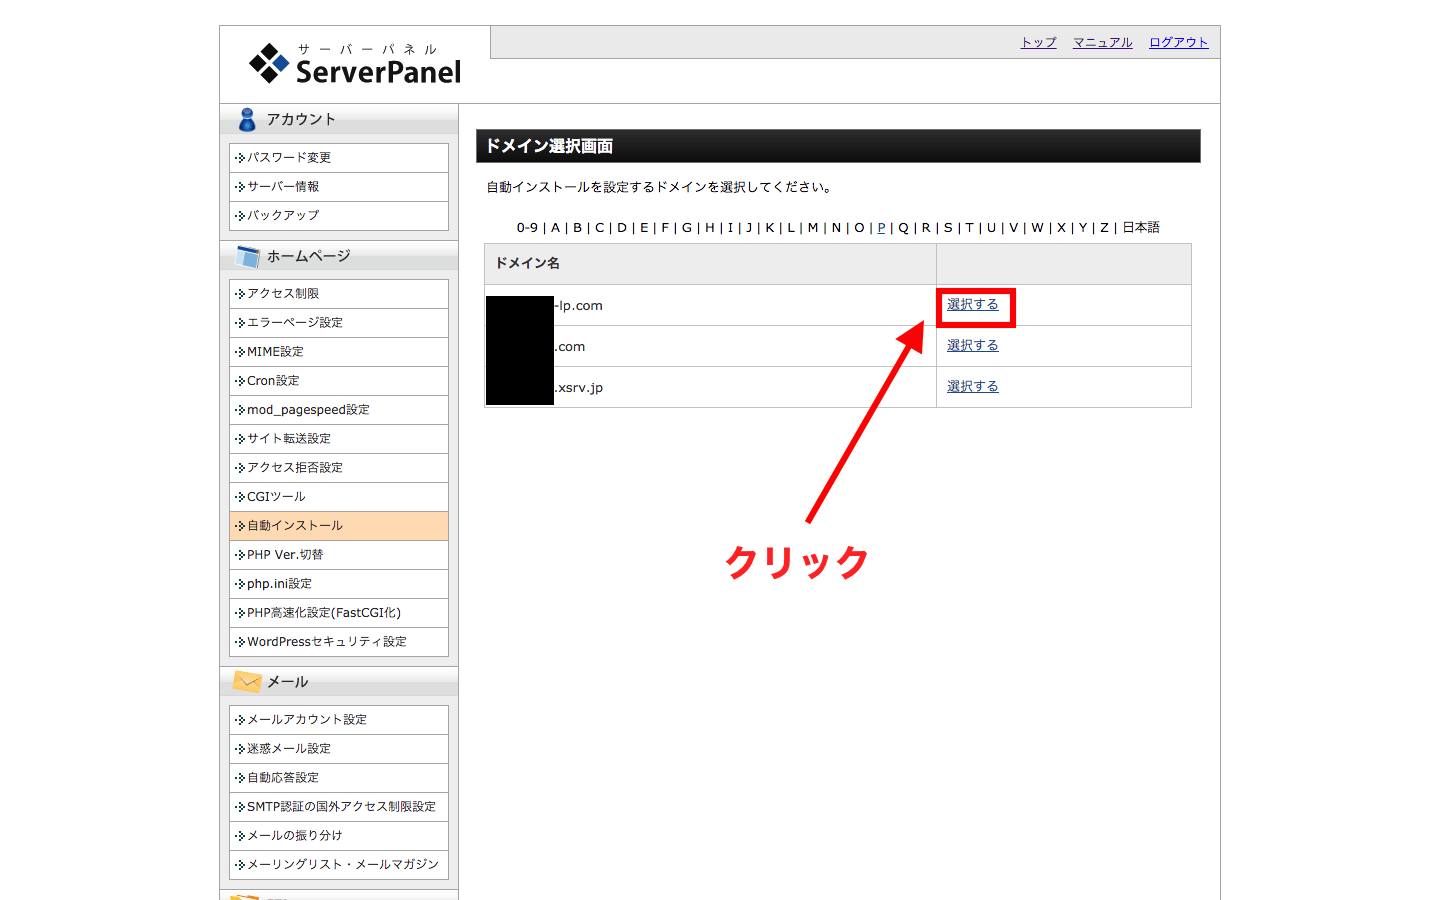
4.ドメインを選択する
サブにブログを作りたいドメインを選択します。
5.プログラムのインストール
「プログラムのインストール」タブをクリックします。

6.WordPress 日本語版をインストール
一番上に「WordPress 日本語版」が出てくるので、「インストール設定」をクリックします。

7.必要事項を入力
必要事項を入力し、「インストール(確認)」をクリックします。
データベースは「自動でデータベースを生成する」のままで結構です。
