
バズ部が提供している無料WordPressテンプレートXeory Baseの記事下やランディングページにCyfonsの登録フォームを埋める場合のCSSのカスタマイズをしてみました!
コンテンツSEOブログを運営する時に人気を博しているのがXeoryです。Cyfonsのメルマガフォームをうまくカスタマイズしてメルマガ登録率をアップさせちゃいましょう!
CyfonsフォームのHTMLソースを該当箇所に貼る
<form method="post" action="http://yonaminetakayuki.jp/freemember/formadd/?group_id=1" accept-charset="UTF-8">
<table border="0">
<tr>
<td>お名前</td>
<td>
<input type="text" id="firstname" name="firstname" value="" placeholder="姓"> <input type="text" id="lastname" name="lastname" value="" placeholder="名">
</td></tr>
<tr>
<td>メールアドレス</td>
<td><input type="text" id="Email1" name="email1" value="" placeholder="メールアドレス"></td>
</tr>
<tr><td colspan="2" align="center">
<input name="status" type="hidden" value="LOGIN" />
<input type="submit" id="login" name="login" value=" 登 録 ">
</td></tr>
</table>
</form>
フォーム自体にあったstyleを外したシンプルなフォームです。実際に埋め込んだものがこれ。
xeorybaseのランディングページに貼ると下図のようになった。

CSSでカスタマイズ
まずは<form></form>全体をdiv class=”cyfons”タグで囲む。
<div class="cyfons">
<form method="post" action="http://yonaminetakayuki.jp/freemember/formadd/?group_id=1" accept-charset="UTF-8">
<table border="0">
<tr>
<td>お名前</td>
<td>
<input type="text" id="firstname" name="firstname" value="" placeholder="姓"> <input type="text" id="lastname" name="lastname" value="" placeholder="名">
</td></tr>
<tr>
<td>メールアドレス</td>
<td><input type="text" id="Email1" name="email1" value="" placeholder="メールアドレス"></td>
</tr>
<tr><td colspan="2" align="center">
<input name="status" type="hidden" value="LOGIN" />
<input type="submit" id="login" name="login" value=" 登 録 ">
</td></tr>
</table>
</form>
</div>
背景色を指定する
次にテーマ編集か、jetpackのカスタムCSSで以下のようなCSSを設定しよう。ここではjetpackのカスタムCSSに追加する。以下のCSSを指定しよう。
.cyfons {
	background: #005589;
}

.cyfons form {
	width: 100%;
	text-align: -webkit-center;
}

.cyfons table {
	border: none;
}

.cyfons td {
	border: none !important;
	text-align: center;
}

.cyfons input {
	width: 100%;
	font-size: 50px;
	font-weight: 700;
	border-radius: 10px !important;
	padding: 10px !important;
	margin-top: 10px;
	border: none !important;
}

.cyfons input[type="submit"] {
	width: 50%;
	font-size: 50px;
	font-weight: bold;
	background: #ff0000;
	margin-bottom: 15px;
}

@media screen and (max-width: 768px) {
	.cyfons input {
		width: 100%;
		font-size: 50px;
	}

	.cyfons input[type="submit"] {
		width: 100%;
		font-size: 60px;
	}
}

@media screen and (max-width: 414px) {
	.cyfons input {
		font-size: 25px;
	}

	.cyfons input[type="submit"] {
		width: 80%;
		font-size: 40px;
	}
}
すると下図のようになった。 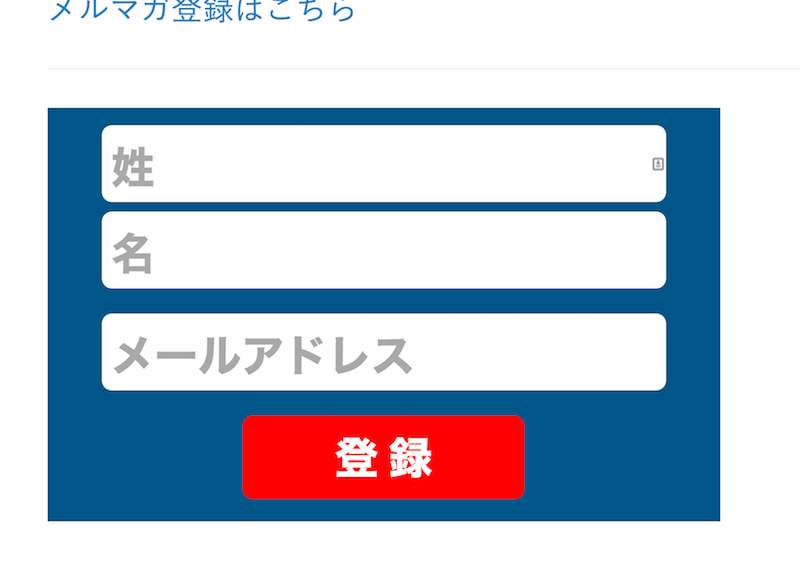 ちなみに左側の「姓名」と「メールアドレス」は不要なので削除した。HTMLソースとCSSをそれぞれ記載しておきます。
<div class="cyfons">
<form method="post" action="http://yonaminetakayuki.jp/freemember/formadd/?group_id=1" accept-charset="UTF-8"> <table border="0">
<tr>
<td><input type="text" id="firstname" name="firstname" value="" placeholder="姓"><input type="text" id="lastname" name="lastname" value="" placeholder="名"></td>
</tr>
<tr>
<td><input type="text" id="Email1" name="email1" value="" placeholder="メールアドレス"></td>
</tr>
<tr>
<td colspan="2" align="center"><input name="status" type="hidden" value="LOGIN" /><input type="submit" id="login" name="login" value=" 登 録 "></td>
</tr>
</table>
</form>
</div>
.cyfons {
	background: #005589;
}

.cyfons form {
	width: 100%;
	text-align: -webkit-center;
}

.cyfons table {
	border: none;
}

.cyfons td {
	border: none !important;
	text-align: center;
}

.cyfons input {
	width: 100%;
	font-size: 50px;
	font-weight: 700;
	border-radius: 10px !important;
	padding: 10px !important;
	margin-top: 10px;
	border: none !important;
}

.cyfons input[type="submit"] {
	width: 50%;
	font-size: 50px;
	font-weight: bold;
	background: #ff0000;
	margin-bottom: 15px;
}

@media screen and (max-width: 768px) {
	.cyfons input {
		width: 100%;
		font-size: 50px;
	}

	.cyfons input[type="submit"] {
		width: 100%;
		font-size: 60px;
	}
}

@media screen and (max-width: 414px) {
	.cyfons input {
		font-size: 25px;
	}

	.cyfons input[type="submit"] {
		width: 80%;
		font-size: 40px;
	}
}
>>サンプルページ
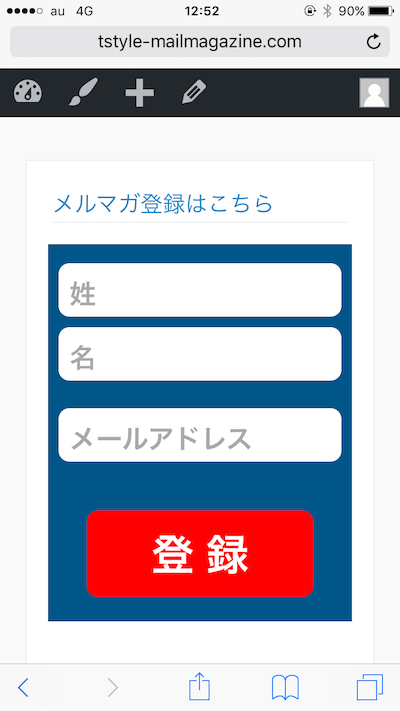
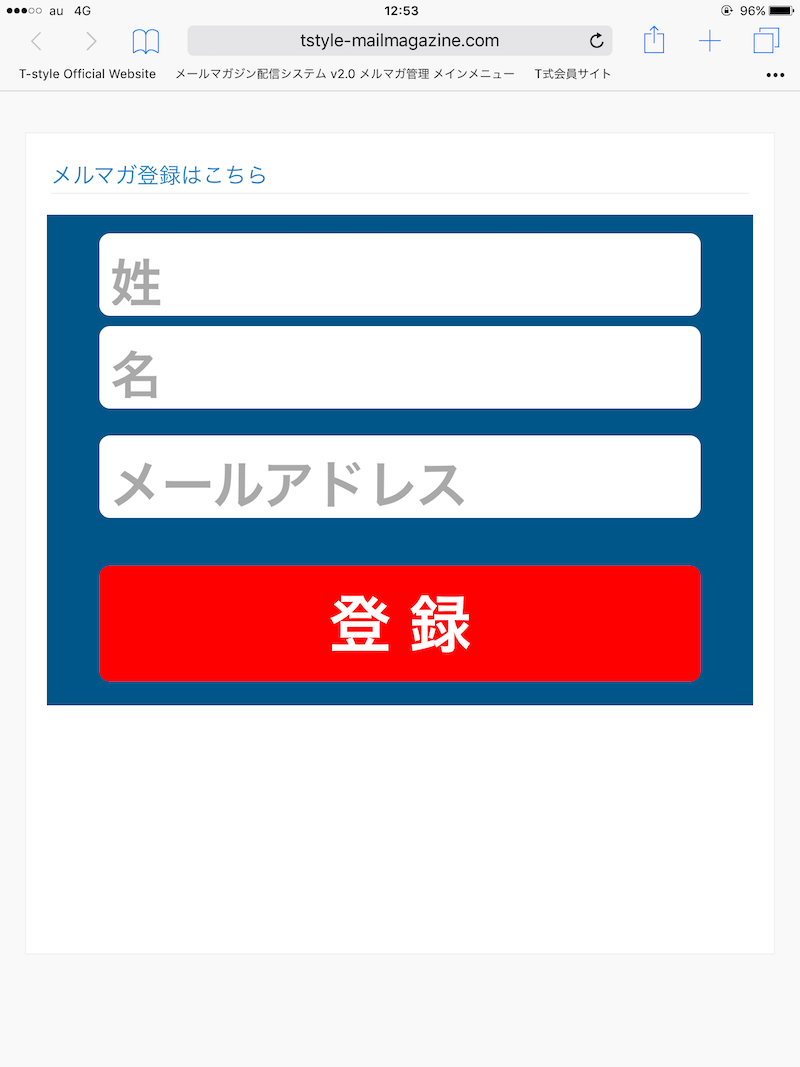
iPhone6とiPad miniで見た時のブラウザ画面
iPhone
iPad mini
以上です。何か不具合があればコメントよろしくです!